STL’s for 3D printing: in-and-out of SketchUp in two clicks
January 18th, 2013 | Published in Google SketchUp
MakerBot CEO Bre Prettis is a pretty cool customer, so I took it as a good sign when he yelped with excitement at SketchUp's 3D Basecamp 2012 after the announcement of SketchUp’s STL plugin.
Reading and writing STL files from SketchUp is something that users have been able to do for a while with the help of two separate ruby plugins. But as 3D printing has continued to boom, we’ve been thinking of ways to make this file exchange easier. So we emailed the original plugin developers, Jim Foltz, Nathan Bromham, and Konrad Shroeder, and asked if they would be interested in letting us combine their tools into a single open source plugin. All three responded with a resounding “yes!”
But, what’s the big deal with STL, anyway? There are many who believe, and so do I, that we're on the verge of a new age in fabrication and prototyping. You can now take designs and make them a reality in the comfort of your own creative space. We're just scratching the surface with this technology that brings digital back to analog, and for the moment, the STL file format is a lynchpin between 3D models and print-ready objects.
 |
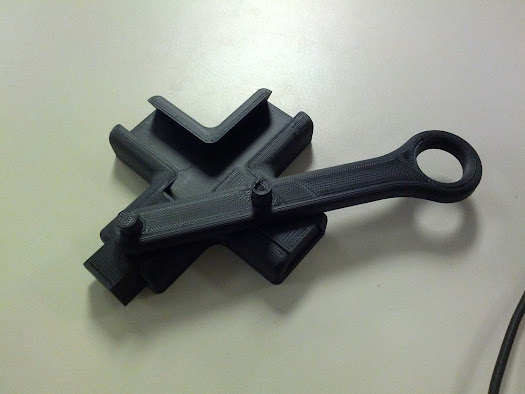
| Our very own do-nothing machine; you'd be surprised how addictive this is |
At the SketchUp office, we’ve been experimenting with MakerBot Replicators for a while now. Our experiences range from high-five successes to epic failures. One tale that sticks out in my mind, however, is when we helped our friend Omar save $120. Omar owns a vacuum cleaner that had a small, uniquely shaped plastic piece that broke. To repair the piece, he had to replace a whole section of the vacuum (hence, the $120 price tag). He sent me an email and asked if we could try replacing the piece with our 3d printer. I told him to stop by my desk with the broken piece and pair of digital calipers. After about an hour of SketchUp modeling, we had what looked like a perfect replacement. I exported the model to STL, opened the file with Replicator G, exported the file to Alpha (we’ve named our three Replicators Alpha, Bravo, and Charlie) and let the MakerBot do the rest. To my pleasant surprise, the piece worked perfectly.
| When it comes to vacuum cleaner maintenance, it turns out that cheap plastic is great for replacing cheap plastic. |
While you can bring your custom SketchUp designs to life with the STL plugin and a 3D printer, you can also import pre-made content to modify prior to print. For example, my oldest son wanted to play with an R2D2 last weekend. I found one on MakerBot's Thingiverse database and imported all of the STL files into SketchUp to rearrange the pieces to fit on a single build platform (you can download the model here). I exported to STL and about 7 hours later, I had a complete R2D2. Pro Tip: Run ThomThom’s Cleanup script to reduce triangulated geometry into single coplanar faces.
So how does the plugin work?
With the latest version of SketchUp 8, it's easier than ever to install plugins:
1. Visit STL the project page at https://github.com/SketchUp/sketchup-stl.
2. Click on the link at the top of the page and download the RBZ file to your computer.

3. Open SketchUp. Click Window (Windows) or SketchUp (Mac) > Preferences > Extensions > Install Extension…
4. Browse to the folder that has the RBZ file, select it and click "Open." You will see a warning message that asks if you're *sure* you want to install the plugin. Click "Yes."
So now you’re all set with the STL plugin: you can now export entire SKP files to STL or just specified groups. What about the 3D printer? It turns out that Make magazine released a great issue comparing a broad range of 3D printers so you can find the right one that fits your needs and your budget.
Last but not least, if you're a developer and interested in contributing the SketchUp STL plugin project, feel free to visit the project page to get started. Happy designing and printing!
Posted by Tommy Acierno, SketchUp Team