Prosthetics and 3D Printing: the design thinking behind FidoHand
July 24th, 2014 | Published in Google SketchUp

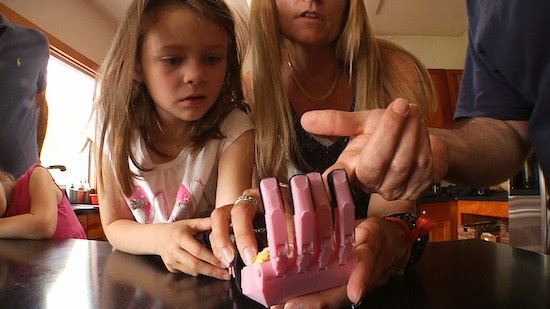
A FidoHand fitted to Mary in the San Francisco bay area. Check out local news coverage of FidoHand here.
Origins of a community-inspired 3D printed prosthesis
“I’m really kind of a tinkerer, I have been my whole life,” says Dan Bodner. Dan is also an avid follower of new technology, including 3D printing. He was intrigued when he heard of the Robohand project featured by MakerBot last year: “There were two players in the original design: Richard Van As, a master carpenter in South Africa and Ivan Owen, a mechanical prop maker in Washington state.”
Owen and Van As developed Robohand with two 3D printers provided by MakerBot. Parents who have children with missing fingers often contact Richard in hopes of making their kids’ lives a bit easier.
Iterating on the design
After learning about Robohand, Dan began thinking how he could design his own 3D printed prosthesis. “It all began through my friend,” he said, a friend at a local Bay Area hospital. She is a doctor who works with children in need of a solution like this.

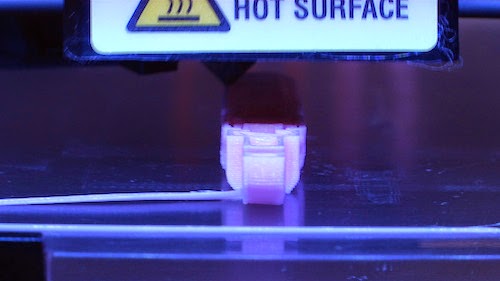
FidoHand during 3D printing. Check out local news coverage of FidoHand here.
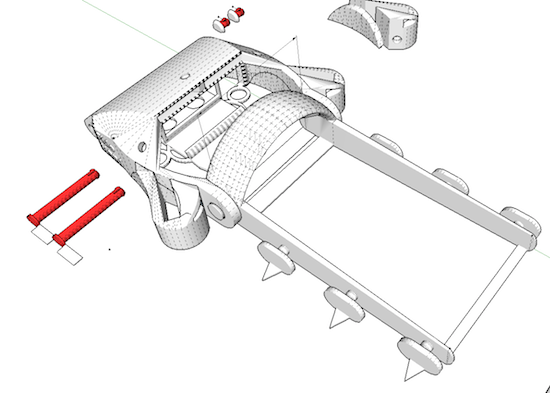
Dan received SketchUp files from a MakerBot designer who had done some of his own modifications to Robohand. “I stayed with SketchUp, because I started with SketchUp. I had the building blocks there,” Dan explained. He didn’t know much about SketchUp before starting the project, so he learned 3D modeling from scratch to design FidoHand. “It looked easy, but to make a printable model took a lot of practice.”

FidoHand in SketchUp.
SketchUp’s Extension Warehouse was very helpful along the way, “Solid Inspector was absolutely necessary,” says Dan, “Forget about anything if you don’t have it.” [(Ed.) Somewhere Thom Thom is doing a jig right now.] Dan also used SketchUp STL to generate STL files for his MakerBot. Dan added that a 3Dconnexion mouse helped as well: “You use the left hand to orbit/pan/zoom in 3D and the right for designing.”
Design-thinking for 3D printed prosthetics
The obstacle Dan wanted to overcome was how to distribute 3D prosthetics to people and not have to be physically present to fit them. “There is a great volunteer effort called e-NABLE that helps fit 3D printed prosthetics for children,” Dan says. But he wanted to simplify the process even further.
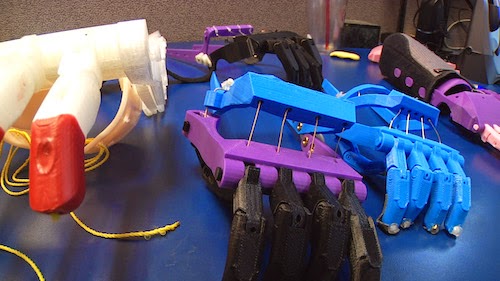
Dan started by simplifying the design: FidoHand went from a fifty to six-piece design over the course of eleven months of design iterations. The reduction of part numbers is important for a number of reasons: in particular fewer parts means easier assembly and better structural integrity. “I tried to keep all of the parts in a single file, just spread out,” he said when he spoke about his SketchUp file organization. Minor changes were tracked by making parts into components, copying them, and setting them to the side in the SketchUp file. When a new major change was needed, Dan made a new version of the file. He chuckled saying, “I made fifty-plus versions of the file. If I completely screw up or go the wrong direction, I can start over.”

Iterations of FidoHand. Check out local news coverage of FidoHand here.
Dan also developed his own custom fit process. Each FidoHand starts with a few easy measurements from the recipient.
What’s next for FidoHand?
A little girl in Louisiana will receive the second FidoHand in the coming weeks, so Dan is waiting to hear how that goes (and we’ll be calling back to see too). On August 5th, Dan will be speaking at the University of San Francisco in front of the Pediatric Device Consortium, which is sponsored in part by the FDA. There he hopes to gain insights and advice from an interdisciplinary team of professionals on ways to improve FidoHand. “This is really a pivotal point in the development of humankind. The combination of SketchUp and a 3D printer is so empowering for people like me that always have ideas.”
Posted by Deana Rhodes, SketchUp Team