Creating web-ready images with SketchUp Pro and LayOut
December 28th, 2009 | Published in Google SketchUp
As you probably know, working with LayOut (included with SketchUp Pro) is an excellent way to prepare printed documents and screen presentations with 3D models. What you might not know, is that it's also a great way to prepare images of SketchUp models for publishing on the web.
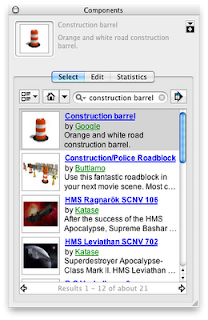
Let's start with the idea that we're building a website and need to create an "Under Construction" webpage until we are ready to launch. First lets find something in the Google 3D Warehouse that conveys the feeling of under of being "under construction." In SketchUp 7, the component browser lets us find models in the 3D Warehouse and download them directly into our document without leaving SketchUp. Here's the model I'm going to use:
 After we select a model, we need to adjust its style slightly. On the web, we often don't care about the model's sky or ground color. In fact, we often don't want the sky and ground color to show up at all. We want the model to have a transparent background, making it compatible with a variety of webpage background colors.
Now for the first trick: we can prepare our SketchUp model to give LayOut a hint that we want a transparent document background. We give LayOut the hint by making the model background white. (Actually, any color will do, as long as it matches the paper color of the LayOut document.)
In the styles inspector, go to the "Default Styles" collection and select the "Engineering style." This style turns off sky and ground and makes the background white, the very same paper color found in a blank LayOut document. Like so:
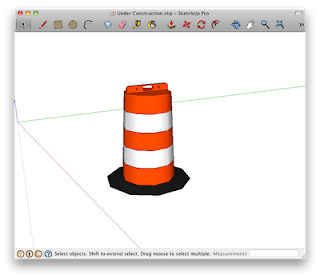 Next, we'll get our model ready for the web by adding some visual texture in LayOut. Select "Send to LayOut…" from the File menu to create a new LayOut document with the construction barrel SketchUp model. Next, adjust the model size or camera angle and use the other LayOut tools for adding text or annotating the model.
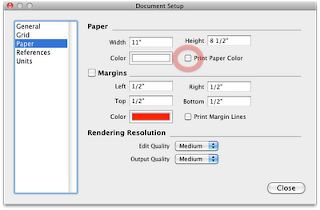
 Now for the second trick: open up the "Document Setup…" panel and select the "Paper" tab. Make sure that the "Print Paper Color" is turned off. This setting not only works for printing but for exporting images as well. During image export, disabling this setting tells LayOut to create a transparent background.
 With all the settings in place, simply export the image in your favorite web format (PNG is a good format choice, since it supports transparency) and add it to the "Under Construction" web page. Here's an example of the original image centered on a web page with the default white background:
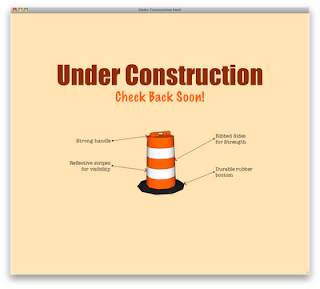
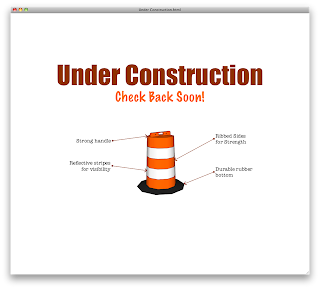 However, when we inevitably change our mind about the background color, the image with a transparent background doesn't require an additional export. Here's the same image on a web page with a different background color.
 Images with transparent backgrounds are much more flexible when working on the web. SketchUp Pro and LayOut make creating web-ready images a very simple process. Just remember to let LayOut know you want a transparent model background by selecting a SketchUp background color that matches your LayOut paper color.
Let's start with the idea that we're building a website and need to create an "Under Construction" webpage until we are ready to launch. First lets find something in the Google 3D Warehouse that conveys the feeling of under of being "under construction." In SketchUp 7, the component browser lets us find models in the 3D Warehouse and download them directly into our document without leaving SketchUp. Here's the model I'm going to use:
 After we select a model, we need to adjust its style slightly. On the web, we often don't care about the model's sky or ground color. In fact, we often don't want the sky and ground color to show up at all. We want the model to have a transparent background, making it compatible with a variety of webpage background colors.
Now for the first trick: we can prepare our SketchUp model to give LayOut a hint that we want a transparent document background. We give LayOut the hint by making the model background white. (Actually, any color will do, as long as it matches the paper color of the LayOut document.)
In the styles inspector, go to the "Default Styles" collection and select the "Engineering style." This style turns off sky and ground and makes the background white, the very same paper color found in a blank LayOut document. Like so:
 Next, we'll get our model ready for the web by adding some visual texture in LayOut. Select "Send to LayOut…" from the File menu to create a new LayOut document with the construction barrel SketchUp model. Next, adjust the model size or camera angle and use the other LayOut tools for adding text or annotating the model.
 Now for the second trick: open up the "Document Setup…" panel and select the "Paper" tab. Make sure that the "Print Paper Color" is turned off. This setting not only works for printing but for exporting images as well. During image export, disabling this setting tells LayOut to create a transparent background.
 With all the settings in place, simply export the image in your favorite web format (PNG is a good format choice, since it supports transparency) and add it to the "Under Construction" web page. Here's an example of the original image centered on a web page with the default white background:
 However, when we inevitably change our mind about the background color, the image with a transparent background doesn't require an additional export. Here's the same image on a web page with a different background color.
 Images with transparent backgrounds are much more flexible when working on the web. SketchUp Pro and LayOut make creating web-ready images a very simple process. Just remember to let LayOut know you want a transparent model background by selecting a SketchUp background color that matches your LayOut paper color.