Tips & Tricks: Using Images in Google documents
July 1st, 2010 | Published in Google Docs
As anyone working on a term paper, project plan, or party invitation will tell you, there’s a lot of truth in the old saying, “a picture is worth a thousand words.” With the new Google Documents editor, you can easily find and insert the perfect image into a document and it will behave exactly as you’d like it.
To get started, select Image from the Insert menu. In Google documents, you can import images from your computer or from a URL. But sometimes you don’t have the image you want to use on hand. Whether it’s a map of the Roman Empire or a photo of a golden retriever, you can now insert an image directly from Google Image Search.

You can add any .gif, .jpg, .png, .bmp image file, up to 2 MB in size.
Wrapping it up
It can be important for images in your document to interact in certain ways with your text. Maybe you want your term paper’s sentences to wrap around a country’s flag? Or perhaps you want images to embellish the lines of your restaurant’s menu?
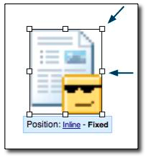
In the new version of documents, we’ve added a new setting for images -- Inline or Fixed. An Inline image will behave like text -- as you add or subtract words and lines, the image will move around the page, just as words within a certain paragraph do.

Meanwhile, a Fixed image will stay anchored to a specific paragraph, and your words will wrap around it.

You can drag and drop the image around your document if the Fixed position is selected. Or, for an Inline image, you can copy and paste it as you would move around the text within your document.
Resizing images
To resize an image within your document, you can click on it, and a resize box will appear. You can maintain the aspect ratio of the image by dragging from the corner of the rectangular resize window. If maintaining that ratio isn’t important, you can click one of the boxes on any side of the image and drag until you’ve resized the image to your liking.

These advanced image options are available only for documents created in the new version of Google Documents. Let us know what you think in our help forum.
To get started, select Image from the Insert menu. In Google documents, you can import images from your computer or from a URL. But sometimes you don’t have the image you want to use on hand. Whether it’s a map of the Roman Empire or a photo of a golden retriever, you can now insert an image directly from Google Image Search.

You can add any .gif, .jpg, .png, .bmp image file, up to 2 MB in size.
Wrapping it up
It can be important for images in your document to interact in certain ways with your text. Maybe you want your term paper’s sentences to wrap around a country’s flag? Or perhaps you want images to embellish the lines of your restaurant’s menu?
In the new version of documents, we’ve added a new setting for images -- Inline or Fixed. An Inline image will behave like text -- as you add or subtract words and lines, the image will move around the page, just as words within a certain paragraph do.

Meanwhile, a Fixed image will stay anchored to a specific paragraph, and your words will wrap around it.

You can drag and drop the image around your document if the Fixed position is selected. Or, for an Inline image, you can copy and paste it as you would move around the text within your document.
Resizing images
To resize an image within your document, you can click on it, and a resize box will appear. You can maintain the aspect ratio of the image by dragging from the corner of the rectangular resize window. If maintaining that ratio isn’t important, you can click one of the boxes on any side of the image and drag until you’ve resized the image to your liking.

These advanced image options are available only for documents created in the new version of Google Documents. Let us know what you think in our help forum.